|
|
 |
|
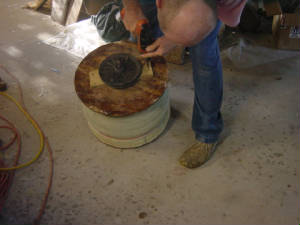
This page is kind-of a blow by blow description of the construction and mounting of the nozzle. I "hope", if my
calculations are correct, I can come close to the 25% regeneration of my battery banks while sailing using my propulsion propeller
as a production source running back through the system, we'll see what happens.

|
|
|
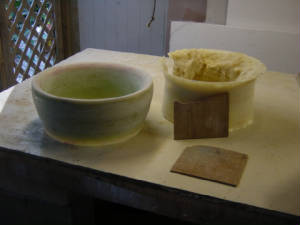
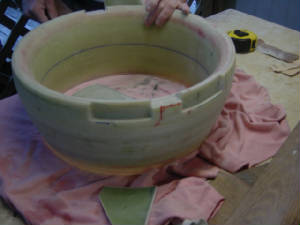
After the outside surface is machined to the template the core mold can be taken off the "home-made" lathe
fixture and the foam removed to reveal the nozzle. It took about 75 layers of 17 oz. bi-axe cloth with a few 6 oz. thrown
in for outside finish, "thats-a-lot of glass", don't think it will break apart, or at least I hope......chuckle.....strong
is good... I think if I were going to make another one I would do some coring in the interior portion. We considered
that when we started but decided that since there could be ware on the interior diameter from dirt and other things in the
water it would be better to go solid........
Enter images and other content here
|
|
|
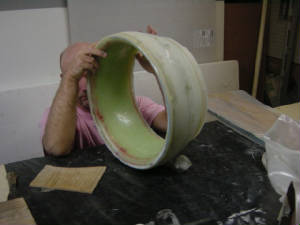
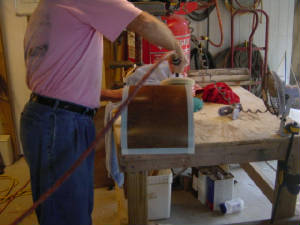
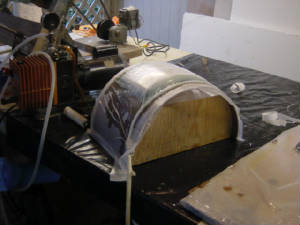
The next order of business is to build the mounts, or "wing-lets" as we call them. A form was made
to the correct diameter to form the surface that will actually mount to the nozzle. After waxing and using a release
agent to make sure the resin doesn't stick to the temper board used we did the 12 + layers of 17 oz. bi-axe cloth and installed
the vacuum bag over the whole package. The bag insures that we remove any air that is trapped in the layup, "air no
good", "solid good".... After curing time we can cut the winglets to the correct dimensions and take them to the
boat and see if we can install them and the nozzle..........."hope soooooo"
Enter images and other content here
|
|
|
Enter images and other content here
|
|
|
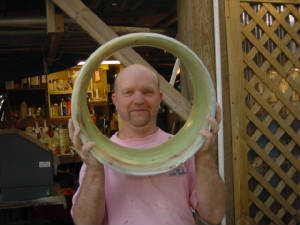
With the winglet supports cut and setting in place with a simulated keel it looks like we should get serious
and see if things fit on the boat........Let's go John

Enter images and other content here
|
|
|
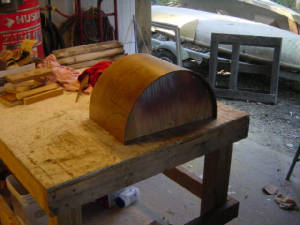
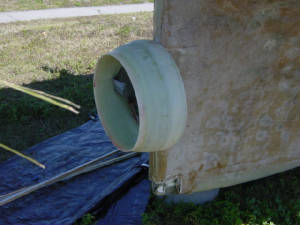
Whew !!!!! Looks like things fit, even if it is using "500 mile-per-hour" tape (DUCK TAPE).
Now the final fitting including the bolts to hold the winglet supports to the nozzle. Because of the rudder configuration
on the boat the nozzle cannot be epoxied directly to the rear of the keel, the winglet supports can be epoxied to the hull
and the nozzle attached to them allowing the nozzle and the prop to be removed for rudder installation, sounds complicated
but it's not, things just have to be done in order.

Enter supporting content here
.
|
|
|
|